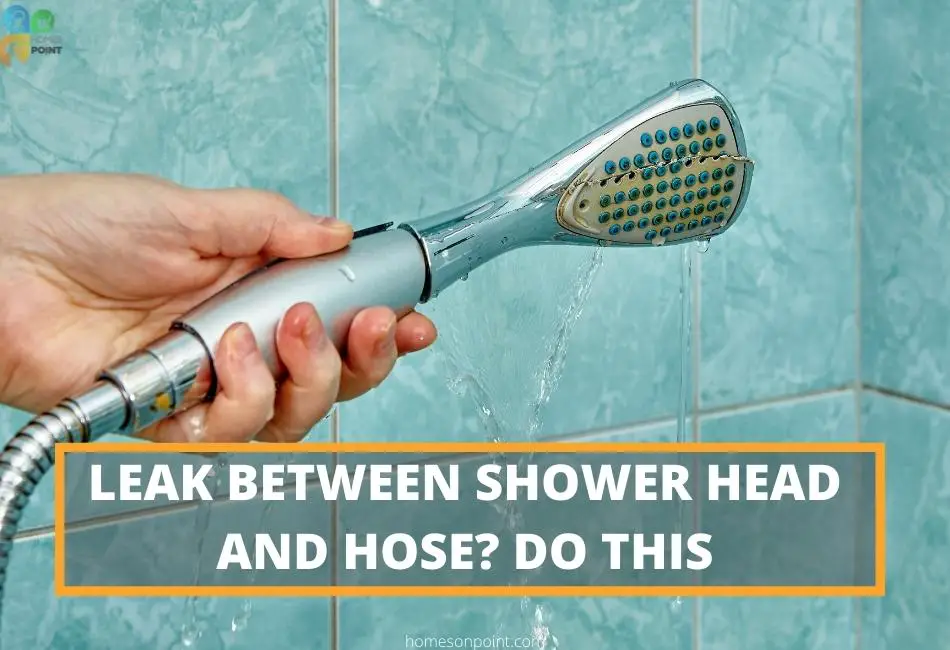
A leak between your shower head and hose can be annoying and wastes water. Personally, I hate to see water going to waste so I’m always on the lookout for leaks. If you are reading this article, then you might have experienced this problem too and how frustrating it can be taking shower with water gushing out from between the shower head and the hose.
Sometimes, the water coming out is so much that almost about half of the water from your shower is wasted before it even hits you. When this happens, you don’t get the required concentration of water on your body and this makes showering quite a challenge.
When you turn off the shower, the constant drip-drip-drip sound from the shower head can be really maddening.
So, what causes a leak between the shower head and the hose? And more importantly, what can you do to fix it?
In this article, I’ll show you how to troubleshoot and fix the problem so that you can stop wasting water and get back to enjoying your showers.
What Causes A Leak Between The Shower Head And Hose?
There are a few things that could be causing the leak between your shower head and hose:
- Worn-out washers
- Cracked or damaged shower heads
- Damaged hose
- Improperly installed shower head
1. Worn Out Washers
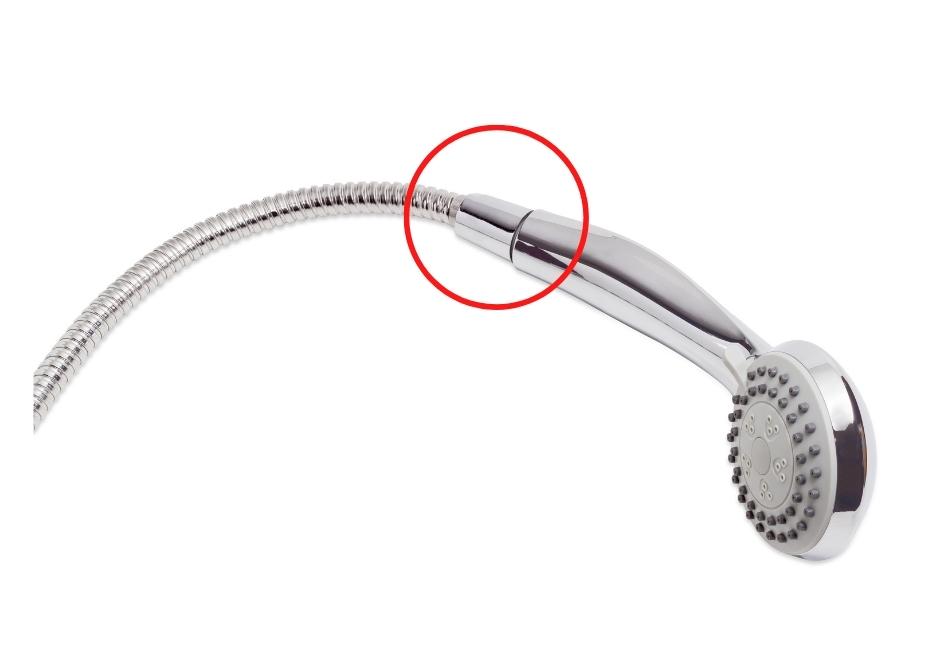
The most common cause of a leak between the shower head and hose is a worn washer. The washer is a small rubber or plastic disc that is located under the shower head. Its function is to create a watertight seal between the shower head and the hose.
Over time, these washers can become worn out from use and no longer provide a tight seal. As a result, water will begin to leak out from around the base of the shower head.
2. Cracked Or Damaged Shower Heads
Another possible reason for a leak is a cracked or damaged shower head. If the end of the shower head that connects to the hose is cracked, then water will be able to escape through the crack and cause a leak.
This can happen as a result of dropping the shower head or simply from normal wear and tear over time.
3. Damaged Hose
Another potential cause of a leak is a damaged hose. If the hose that connects the shower head to the water supply is damaged, then water will be able to escape through the holes or cracks in the hose and cause a leak.
This can happen if the hose is kinked or if it has become brittle and cracked from age. It could also be that the host is just of poor quality and is not meant to last for a long time.
4. Improperly Installed Shower Head
Maybe you installed the shower head yourself or wasn’t done by a professional. If the shower head was not installed properly, then it could also be the reason for the leak.
For example, if the washer is not installed correctly or if the shower head is not screwed on tightly enough, then it could cause a leak. I have even seen an instance where the one fixing the shower head forgot to put the washer in, causing a leak.
When the shower head is tightened too much, it can also cause a crack that leads to a leak.
How To Fix A Leak Between The Shower Head And Hose
Luckily, fixing a leaky shower head is a relatively easy DIY project. You can repair this in just a few minutes and make
Things You’ll need
- Adjustable wrench or rubber jar opener
- New washer
These items are all optional and will only come in handy if you need them. I will explain in a bit.
Procedure For Troubleshooting And Fixing The Leak
Step 1: Check the hose collar to see if it is loose
Oftentimes, the type of hose may make the collar rotate at the connection. this can make it loose over time. Hold the shaft and try turning it to the right to make it tighter. It might just be it and your leak could be solved.
If it doesn’t get fixed then we need to look a bit deeper into the problem.
Step 2: Unscrew the shower head
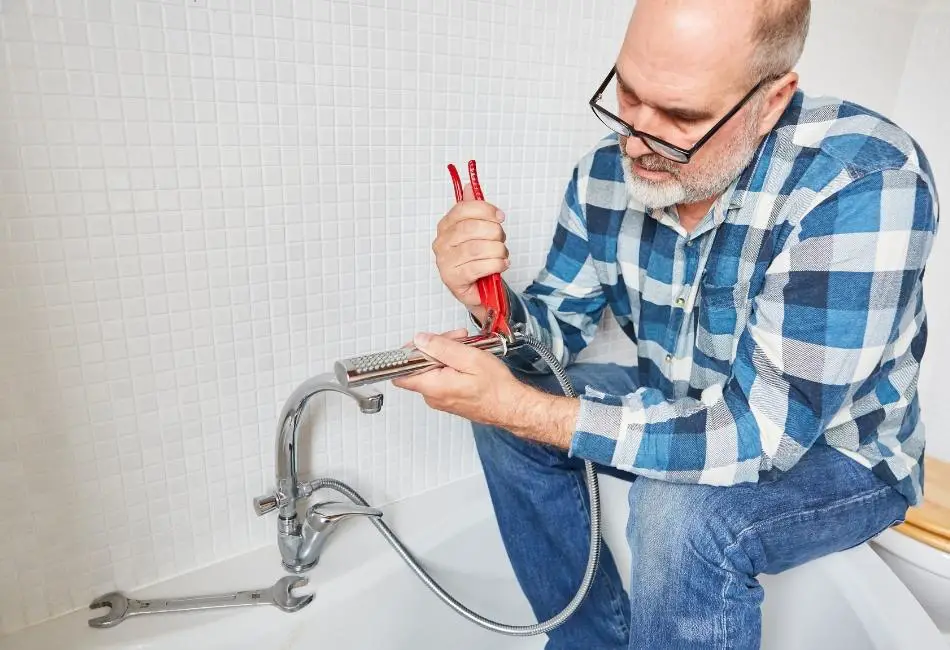
You can try using your hands but if it is too tight, you can use an adjustable wrench or a jar opener. Do not use any tool with teeth to try and unscrew the shower head because it will bite right into the metal collar and damage it.
The good thing is many collars have two flat spots on the end. You can use these to get more leverage with an adjustable wrench which also has flat jaws so they will grip the collar without damaging it. Give it a twist and the shower head should come right off.
Alternatively, you can also use a rubber jar opener. This is a simple rubber disc with spikes on the underside. You place it over the collar and squeeze it as hard as you can. Then turn the shower head with your other hand and it should come right off.
Step 3: Check the washer
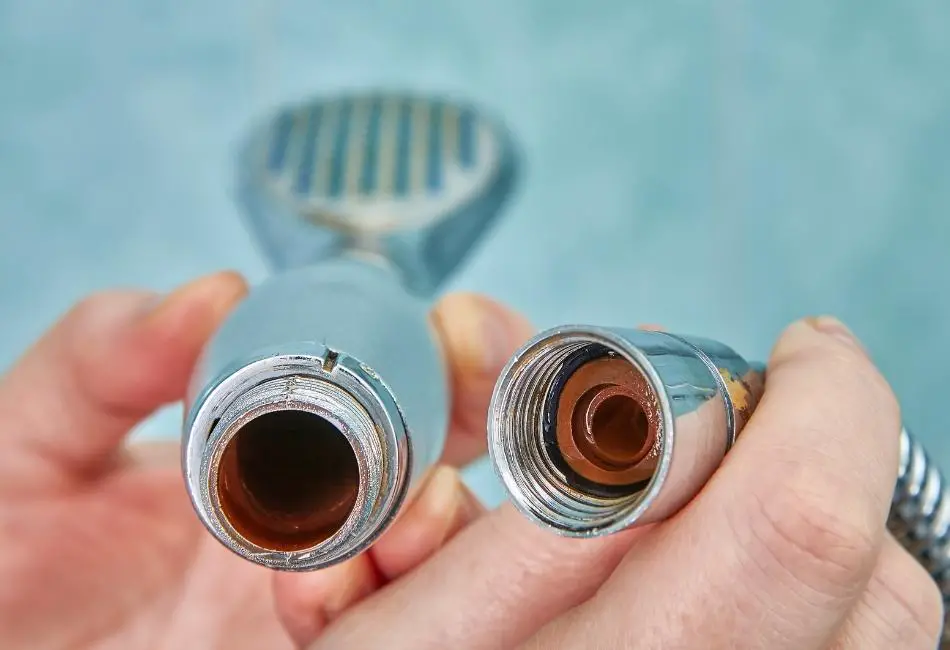
Oftentimes, this is the problem. If it is old and worn out, then it will no longer provide a watertight seal. To check the washer, simply slide the collar down and the washer will pop out for you to remove easily. Remove it and inspect it for any damage.
If it is damaged, then you will need to replace it with a new one. You can get these at any hardware store.
If the washer is not damaged, then you can simply clean it off and flip the washer over. This is an old plumber’s trick that often does the trick. But to be absolutely sure to get rid of the leak, I recommend replacing it.
Step 4: Check the end of the hose and shower head
Before you replace the washer, check the end of the hose and the end of the shower head for any cracks or chips. If there are any then it means you are going to have to replace the hose on the entire shower head.
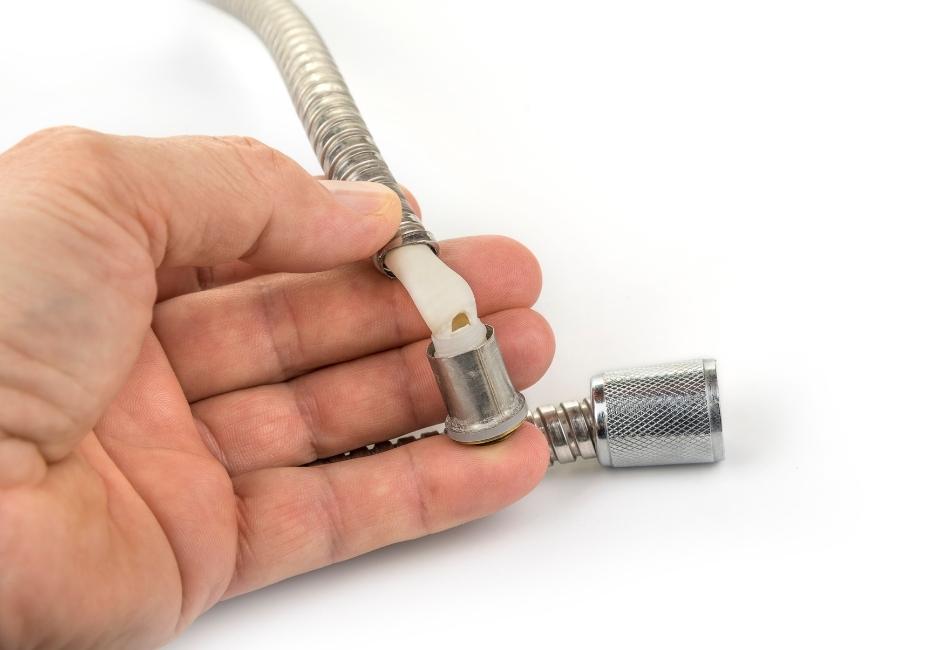
Step 5: Replace the washer and screw on the shower head

Now, push the washer into the hose and make sure it is completely seated. New washers can be tight so you have to work them to push them into place.
Then screw on the shower head and make sure it is tight. Use your hands to tighten it as much as possible. Do not use the adjustable wrench to tighten it because you don’t want to over-tighten it which can crack the shower head.
You can use the rubber jar opener to help you get a tight grip
Step 6: Turn on the water and check for leaks
Now, turn on the water and see if there are any leaks. For the most part, if you fixed everything correctly, then there shouldn’t be any more leaks.
Final Thoughts
Handheld showers are great but they will eventually develop a leak right at the hose connection. This is an easy problem to fix with a few simple tools that you probably already have in your toolbox. In most cases, all you need is a new washer and further tightening.
If you are not confident doing it yourself, I always recommend consulting an experienced plumber to take a look. They will be able to fix it quickly and efficiently without damaging anything else in the process.