Laminate countertops are a popular choice for many homeowners because they are affordable, come in a wide variety, and are very easy to care for. However, over time they can start to look dated and tired. Whether you’re looking to give your kitchen a fresh new look or you’re simply tired of your old laminate countertops, there are plenty of ways to update them without having to replace them entirely.
While a complete renovation may be ideal, it’s not always necessary or affordable. In this article, we will discuss 4 ways to update laminate countertops without replacing them.
Why Update Laminate Countertop?
There are 4 major reasons why you may want to update your laminate countertops. This include
1. Increase Home Value
Perhaps you’re looking to sell your home and you want to increase its resale value. Or maybe you’re not looking to sell anytime soon but you want to increase your home’s value for future resale. Either way, updating your laminate countertops is a great way to do this.
Not only will it make your kitchen look more updated and modern, but it will also make it more appealing to potential buyers.
2. Not To Your Taste
Maybe you just moved into a new home and the previous owner’s style is not to your taste. Or maybe you’ve been living in your home for years and you’re simply ready for a change. Regardless of the reason, if you’re not happy with the way your laminate countertops look, then it’s time for an update
3. Need A New Feel
Sometimes a change is needed simply for the sake of change. If you feel like your kitchen needs a new look, then updating your laminate countertops is a great way to do this. It’s an easy and relatively inexpensive way to give your kitchen an entirely new feel.
4. Experiment With New Design Trends
Maybe you’re someone who loves to keep up with the latest trends. If so, then updating your laminate countertops is a great way to experiment with new design trends without having to completely commit to them.
If you decide you don’t like the trend, you can simply change it back or update it again to something else.
Simple Ways to Update Your Laminate Countertops:
Now that we’ve discussed some of the reasons why you may want to update your laminate countertops, let’s discuss some of the top ways to do so. There are several ways to update laminate countertops without replacing them entirely. These include:
- Painting over it
- Overlaying with thin concrete
- Covering with tiles
- Covering with contact paper
Painting Laminate Kitchen Countertops

One of the simplest, cheapest, and most popular ways to update laminate countertops is to simply paint them, just like painting a laminate kitchen cabinet. You can use any type of paint that you like, but we recommend using a satin or semi-gloss finish.
This will help to protect the countertops and make them easier to clean. Your local paint store will be able to supply you with the proper type of paint and primer for your project.
You can also use a variety of different colors to paint your laminate countertops. If you want a more modern look, you can use a bright, bold color. Or if you prefer a more traditional look, you can use a neutral color.
You have unlimited design and color options when you choose to paint your laminate countertops. Now, let’s go through how to paint your laminate kitchen countertop.
Things You’ll Need
- Water-based acrylic paint
- Paint primer
- High-gloss acrylic topcoat paint
- 9-inch paint roller with foam roller cover
- Painter’s tape
- 220 grit sandpaper/electric sander
- 9-inch paint roller
- Paintbrush
- Mineral spirit
- Paint tray
How To Paint Laminate Kitchen Countertop
Step 1
It is a good idea to sand any surface that you are going to paint. This will help the paint to adhere better and create a more smooth surface. Start by sanding your laminate countertops with 220 grit sandpaper to remove any rough spots from your counter and backsplash.
If you have an electric sander, you can use that instead. It will make the job much faster.
Step 2
After sanding, pour some mineral spirit onto a clean cloth and wipe down the entire surface of your countertops. This will remove any dust from sanding and prepare the surface for painting.
Allow the mineral spirit to dry and run your hand over the countertop to make sure it is completely smooth and free of dust before proceeding.
Step 3
Next, you will need to tape off any areas that you do not want to print and paint. This includes the backsplash, walls, and edges of your countertop. Use painter’s tape to create a clean line and make sure that the paint does not bleed through.
You can also cover your floor, walls, and cabinet with plastic or newsprint to protect them from paint splatters.
Step 4
Mix the primer and paint very well and pour it into the paint tray. Using the paint roller, apply a generous amount of primer to the surface of your countertop. Be sure to evenly coat the entire surface with full roller strokes from front to back.
It is important to keep a wet edge to your paint application while priming and painting countertops to avoid creating any visible lines. Do not stop in the middle of the project and allow the area to dry before continuing.
Use a quality paintbrush as you approach edges and corners to avoid any visible brush strokes.
Allow the primer to dry for at least 6 hours or according to the manufacturer’s instructions before proceeding.
Steps 5
Apply the paint in the same manner as you applied the primer. Be sure to mix the paint well and apply it evenly with full roller strokes. Again, keep a wet edge to avoid any visible lines. Overlap your paint strokes slightly, about an inch to avoid any missed spots.
Use the paintbrush to apply paint to edges and corners. Allow the paint to dry for at least 4 hours or according to the manufacturer’s instructions. Then apply a second coat of paint in the same manner and allow it to dry completely.
Step 6
Once the second coat of paint is dry, apply the final high-gloss acrylic topcoat to the surface of your countertop. Use a water-based acrylic topcoat intended for countertops. This will give your countertops a beautiful shine and protect the paint from scratches and wear.
Using the previous technique, roll on the countertop keeping a wet edge, and evenly coat the surface. Allow the topcoat to dry for about 5 hours and apply a second coat. Wait for at least 24 hours after the second application before using the countertop.
The second application should be enough to create a beautiful and protected kitchen countertop.
Step 7
After the final coat is dry, remove the painter’s tape and enjoy your new kitchen countertop.
Overlay Concrete On Laminate Countertops
Concrete makes a good countertop material and is a great way to update your laminate countertops without having to replace them. This is a fairly easy DIY project that can be completed on a weekend, but if you are not confident in your skills, you can get the services of an expert.
Refinishing your laminate countertop with concrete will give it a whole new look and make it more durable because concrete is a very strong material. After applying the concrete, you can also add color to it to make it more unique.
So how do you overlay concrete on laminate countertops?
Things You’ll Need
- Magic trowel/ Pool trowel
- Concrete mix
- Bucket
- Concrete sealer
- Sponge
- High-grit sandpaper
- Ruber or plastic mallet
How To Refinish Laminate Countertop With Concrete Overlays
Step 1
Scuff the surface of the laminate countertop with high-grit sandpaper to create a rough surface for the concrete to adhere to. Sand evenly over the entire surface and thoroughly clean all dust and debris with a damp cloth in preparation for the concrete.
Remember to use a nose mask as this process can be very dusty and dangerous to your lungs. Also, cover your floor with rubber or old sheets to avoid making a mess.
Step 2
Pour the concrete content into a bucket and mix it with water. Mix one and a half concrete with one part of water. Thoroughly mix the concrete until it has a smooth consistency.
Step 3
Apply the concrete to the surface of the laminate countertop using a trowel. First, overlay the vertical surfaces and then move on to the horizontal surfaces. Apply a thick layer of concrete, to be able to stick to the vertical surface.
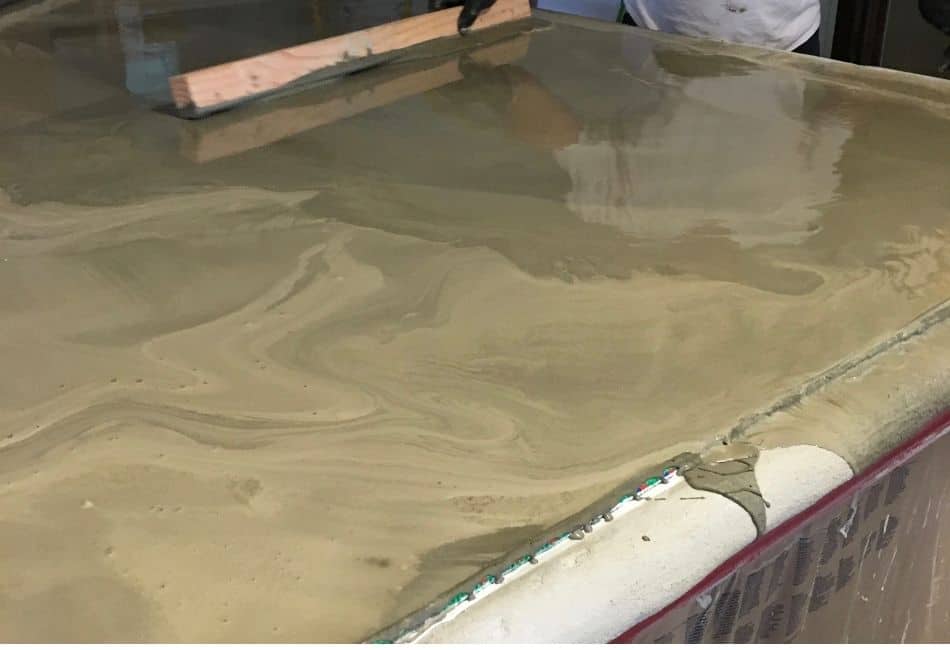
After the vertical surface is complete, mix the remaining concrete into a thin pancake batter consistency and pour it on the surface.
Using a magic trowel or pool trowel, level and smooth the concrete for a thin and consistent layer until a uniform light gray color is achieved. Then allow it to dry thoroughly. If there are any exposed areas, use a reasonable layer of concrete to cover them.
Steps 4
Use non-loading sandpaper to lightly sand the surface of the dried concrete. This will remove all rough edges and create a smooth and consistent surface. After that, clean all the dust with a damp cloth.
Steps 5
Concrete is a very porous material, so it is important to seal it to protect it from stains and water damage. Apply a concrete sealer to the surface using a cotton rag. Work in small sections and make sure to evenly cover the entire surface. Allow it to dry and then apply a second coat for best results.
Step 6
If you desire to paint your concrete countertop, use a primer and good-quality concrete paint to cover the surface. You can either use a brush or roller to apply the paint. Make sure to evenly cover the entire surface and allow it to dry completely before using the countertop.
After painting, use a food-safe finish like tung oil to protect the surface of your newly updated laminate countertop because concrete paints are not food-safe.
Tiling Over Laminate Countertop
One way to update your laminate countertop is by tiling over it. If the laminate countertop and its substrate are in good condition, you can tile over the laminate. It is fairly easy to do and you can find all the materials needed at a home improvement store.
The only caveat is that the tile needs to be thinner than traditional tile because you’re working with a laminate surface.
Things You’ll Need
- Adhesive
- Mortar
- Thinset mortar
- Fiberglass reinforced paper
- Trowel
- Ruber tile float
- 4-inch square ceramic tiles
- Tile grout
- Tile spacers
- Rubber or plastic mallet
- Damp sponge
How To Tile Over Laminate Countertop
Step 1
Wipe clean the laminate countertop with a damp cloth to remove any dirt or grease.
Step 2
Apply the right amount of adhesive directly to the laminate countertop with a notched trowel. You want to use an adhesive that is approved for bonding paper to laminate. The adhesive is not for the tiles, but for the paper that will go under them. The idea is that glue sticks to laminate, paper sticks to glue, mortar sticks to paper, and tile sticks to mortar.
Step 3
Cut a piece of fiberglass-reinforced paper that is slightly larger than the area you plan to tile. Place it on the glued countertop then press it firmly onto the laminate so it sticks very well.
Steps 4
Put a thin layer of mortar on the surface of the paper to acclimate the surface of the paper to the tile and allow it to dry completely. When this is done, you would have converted your laminate countertop to a concrete surface.
Step 5
Apply the thinset mortar, in the same way, using a notched trowel and rake with an ox trowel. The notches on the trowel will help ensure good coverage and evenness in your thinset application.
One of the biggest failures is trying to cover a large area with tile at once, which doesn’t allow the thinset to start drying before you set the tile. So, work in small manageable sections by mixing smaller batches of thinset at a time.
Apply additional thinset mortar to the inside and corners of the tiles to eliminate any void underneath the tile.
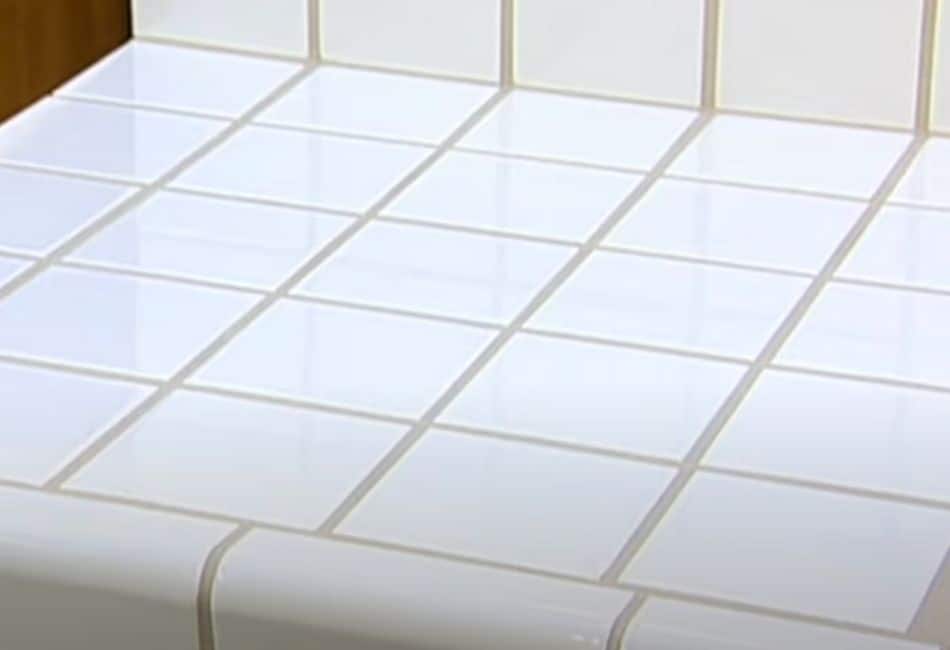
Step 6
Set the tiles in place using tile spacers if necessary to maintain even joints. Tap the tiles with a rubber or plastic mallet to embed them in the thinset firmly.
Steps 7
The next step is grouting the tile. Mix the grout to the consistency of peanut butter and apply it to the joints with a rubber float, holding the float at about a 45-degree angle. Apply a fair amount of pressure to the float to force the grout into the joints, filling them completely
Steps 8
Use a damp sponge to clean the surface of the tile, removing any haze that has formed. This usually needs to be done a few times to get a clean surface.
Using Contact Paper On Laminate Countertop
Contact papers have gained immense popularity over the past few years because of how versatile they are. You can use them to line shelves, cover up old furniture, and yes, even update your countertops.
Covering your laminate countertops with contact paper is an easy and affordable way to give them a whole new look. They allow you to change the look of your kitchen countertop without making major changes or spending a lot of money.
It is worth noting that contact papers aren’t permanent and durable like tile or concrete. They will eventually start to peel and lose their adhesive properties. But, they are a great temporary solution if you’re looking to update your countertops on a budget.
Let me take you through how to use contact paper to update your laminate countertops.
Things You’ll Need
- Contact paper
- Scissors or a knife
- Ruler
- Pencil
- degreasing cleaner
- Plastic scraper/spatula/credit card
- Hairdryer/Pin
How To Cover Laminate Kitchen Countertop With Contact Paper
Step 1
The first step is to measure your countertop. You will need to know the length and width of your countertop so that you can cut the contact paper to size. Once you have the measurements of your countertop, cut the contact paper to size. You may want to leave some extra contact paper so that you can trim it to fit perfectly later.
Steps 2
Clean the countertop thoroughly with a degreasing cleaner. This will help remove any grease or dirt that might be on the surface of the countertop and also help the contact paper stick to the surface better.
Step 3
Remove the backing of the contact paper from one corner and set the contact paper in place on the countertop. Slowly start peeling the backing as you apply the contact paper to the surface of the countertop, starting from one corner and working your way to the other. Use a plastic scraper, spatula, or credit card to smooth it out as you go.
Step 4
Trim any excess contact paper from the edges of the countertop with a scissors or knife. Be sure to go slowly and carefully so that you don’t accidentally cut into the countertop.
Step 5
Use a hairdryer to remove any wrinkles or bubbles that might have formed. Set the hairdryer on the lowest heat setting and hold it about six inches away from the contact paper. Slowly move the hairdryer back and forth over the surface of the contact paper until the wrinkles or bubbles have disappeared.
Alternatively, you can pop with a pin any small bubbles that have formed and then use the hairdryer to smooth them out.
Final Words
There you have it. These are four easy ways to update laminate countertops without replacing them. You don’t need to discard your old countertops or spend a lot of money to give them a new look. With a little bit of creativity, you can transform your kitchen countertops on a budget. I hope you found this guide helpful. Thanks for reading.